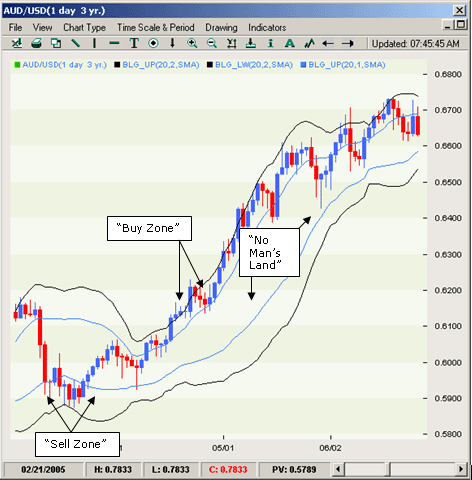
As the price action moves above the upper standard deviation, and is considered overbought, it is a buy signal. Conversely, when the price action crosses below the lower standard deviation, and considered oversold, it is considered a sell signal. Anywhere in between the two is considered "No Man's Land", as shown in the image below.
That is only one strategy out of many to use the Bollinger Bands, another strategy is to buy on a touch of the lower support and sell on the touch of the MA. Conversely, to sell on a touch of the upper deviation and to sell on the return to the MA.
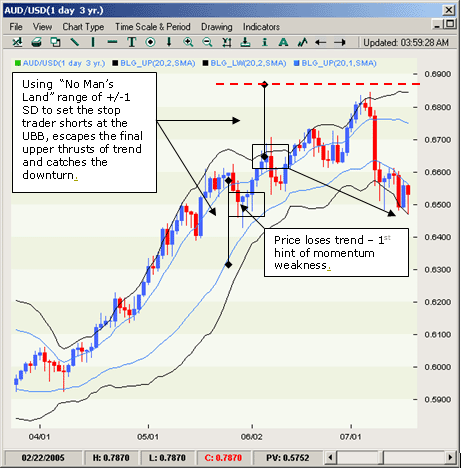
This may sound contradictory, but there are in fact multiple ways of using the Bollinger Bands. It may be easier to use the Bollinger Bands to identify trend exhaustion, as it is easy to discern exhaustion as the price action breaks through the MA and then the opposite standard deviation. The standard deviation can also be used as a gauge to which stops can be placed, so that they won't be falsely triggered by market noise.
No comments:
Post a Comment